
pro home voiceover studio ESSENTIALS
(in order of importance)
Some of the links are affiliate links where Jordan will receive a tiny commission. Luckily, this is absolutely zero effect on your price or purchase. It's just a small way to thank Jordan for curating all of this information and advice :).
acoustic treatment
Acoustic treatment is the most essential tool in a professional sounding voiceover studio. You want to prevent the sound of your voice from bouncing around the room (echo) as much as possible. Smaller rooms, or even closets, are ideal. Because the bigger the room the more hard "echo-ey" walls you have to cover.
A general rule of thumb is to cover as much of the walls or hard surfaces as possible with sound absorbing materials. It's pretty hard to have "too much" acoustic treatment in a voice actor's recording space.
Acoustic treatment will do very little at blocking loud noises. Like traffic, air conditioners, lawn mowers, etc. If you need to block loud noise then I highly recommend saving up for a prefabricated booth. A single-wall booth usually doesn't block much noise and isn't worth the price. Ensure it's at least a double-wall. Studiobricks, Vocalbooth, and LA Vocal Booths are great options.
Low Budget
The thickest pillows, towels, blankets in your house

Any closet. Small or walk-in. More clothes/soft stuff the better

4 moving blankets | cover walls & hard surfaces
Medium budget
2" thick Auralex foam (amount needed depends on room size)
Audimute Acoustic Sheets

High budget

Tri-Booth (also portable) | Sounds fantastic acoustically. If you need to block loud noises like traffic - you'll need a more expensive booth like a Studiobricks or VocalBooth.com booth

Auralex bass traps for trapping bass buildup in corners. Great for ceiling-to-wall corners
MICROPHONES
There is no "one size fits all" microphone for voice actors. While there are some industry standards you'll never truly know how any microphone will sound until you try it on your voice and in your recording environment. Your room and acoustic treatment have a huge impact on your overall sound. Get your acoustics right first and great sound from your microphone will follow.
Some USB microphones are ok if you're just getting started in voice-over. They are more simple to operate. But when it comes time to upgrade in the future - you'll have to invest more than just a new mic. You'll also need a microphone cable and an audio interface.
If you're looking to upgrade your existing microphone - Jordan can analyze your current microphone, voice print, and room - and then recommend specific microphone models that will prevent harshness (especially sibilance), and more. Contact Jordan if interested.
Why no dynamic microphones? While dynamic mics can work great for podcasting - the amount of inherent noise or "hiss" they make is too loud for most professional voice over work.
USB MICROPHONES


NON-USB MICROPHONES
Low Budget
MXL 990 | This mic is shockingly good for such a low price. If cash is tight, start here.
Audio-Technica AT875R | Very natural sounding shotgun mic - works well for a not-so-great sounding room.
TZ Stellar X2 | The cleanest/quietest sounding mic for voiceover I've heard for under $200. Amazing mic.
Medium budget
CAD Equitek E100S | One of my absolute favorite VO mics. Natural, focused, and pro.
Rode NT1 5th Gen | A very quiet and clean sounding mic. Not to bright either. Also connects via USB.
Shure KSM32 | Fantastic mic that is great at reducing sibilance or harshness. Especially on female voices. Very neutral.
High budget
Neumann TLM 103 | An industry standard. Great for character and commercial work.

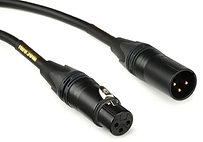
MICROPHONE CABLES
Your Microphone Cable may be the most overlooked, and least sexy, piece of gear in your home recording studio. A cheap mic cable can add unwanted "hiss" or noise into your recording, may limit the full sonic fidelity of your microphone, be more susceptible to electronic interference from other devices (making buzzing noise), and won't last long.
Many budget microphones come with a kit (like a cable, headphones, etc) and may include an XLR cable. Usually these included cables aren't very good quality.
Luckily, investing in a high quality cable will last you a lifetime. Do not go cheap on your cable! If you have a standalone microphone you'll want to invest in a high quality XLR cable. If you have a USB microphone, this section does not apply.

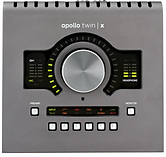
AUDIO INTERFACE or PREAMP
The audio interface is one of the most important pieces of equipment in your home VO studio. What do you plug your microphone and headphones into? An audio interface. The audio interface is what takes your voice from the microphone--->into your computer via a USB or Thunderbolt cable.
Think of the audio interface as the "brain" of where your audio is routed, both in-and-out, of your computer. An audio interface has at least one preamp (which amplifies your microphone signal) and one headphone jack. Which lets you listen to both your voice "live," while you speak, and also any audio that you play back through your computer.
Luckily, you don't have to spend a ton of money on an audio interface to get amazing sounding audio in a pro home voice over studio. The difference, in terms of audible quality, between my recommended budget audio interfaces and high budget interfaces isn't HUGE. But medium-to-high budget audio interfaces tend to be cleaner and quieter sounding compared to low budget audio interfaces. Meaning they tend to sound smoother, less harsh, and have less "hiss" or "noise" compared to some low budget interfaces. But again, my recommended low budget interfaces can still produce professional sounding voice-over recordings.


HEADPHONES
There are SOOOO many types of headphones out there. Having a really solid pair of headphones for your home voice over studio is critical.
Your headphones will serve two purposes:
1) Hearing your own voice while recording.
2) Listening to your recorded audio while you edit and clean up your VO files.
In general, there are two different worlds when it comes to headphones. You have "consumer-grade" headphones. These are headphones you'll find at Best Buy, like Beats headphones. These can be great for casual music listening -- but they are NOT good for professional voiceover work or critical audio tweaking.
Instead, you'll want to buy a pair of headphones that have terms like "studio," "monitoring" or "professional" in their product description. While these types of headphones wildly vary in quality, price, and sound - you'll at least be in a better ballpark going with headphones designed for professional audio work instead of music.
For a multitude of reasons, you'll want to go with "closed-back" headphones. These types of headphones ensure that your voice doesn't "bleed" out of headphones and back-in to your microphone. "Bleed" can result in that horrible feedback squeal noise you hear at the karaoke bar all the time.
Closed-back headphones also isolate the sound inside of your ears while simultaneously reducing the ambient noise around you. This allows you to listen back to your audio without the distraction other random noises blending with the playback of your audio.
Finally, you'll quickly learn that not all headphones sound the same...like...at all.
What's critical is that you pick a pair of headphones that sound as neutral and not-hyped as possible. Many headphones, for example, have a big bass boost or even boost the high frequencies to make it sound extra crisp. But we don't want hype and filters applied to what we're listening to, right? We just want to hear the raw, unfiltered audio when we play our voices back.
Fortunately, I've painstakingly tested a lot of studio headphones. While I haven't tested them all, I've tested many of the popular models used in many home voice over studios.
To find the most balanced, neutral sounding headphones below - I've marked some of them with a "neutral rating." Ranging from:
pretty neutral to very neutral (best).
low budget
Audio-Technica ATH-M30x | Another great pair that's a bit nicer than the M20x model but still affordable. pretty neutral
MEDIUM budget
Audio-Technica ATH-M40x | A fantastic pair for the price. Very comfortable and sound great. Audio-Technica just makes awesome headphones. pretty neutral
HIGH budget
RECORDING/EDITING SOFTWARE (DAW)
So there are ALLOOOOTT of apps out there that let you record and edit audio. I'll be narrowing it down to my top recommendations that are great for voice-over, podcasting, or anything spoken word.
You may see the term "DAW" thrown around a lot. DAW stands for Digital Audio Workstation. This is a super old school term that came out when the ability to record using some sort of digital device became possible. And, the term stuck around and is still used today.
Most DAWs are used by musicians - who require multiple tracks to record and mix with. Like a vocal track, guitar track, piano track, and more. DAWs that have multiple tracks are very powerful - but they can also be incredibly overkill, and overwhelming, for voice over work. But most podcasters, for example, will need a multi-track DAW to edit and mix the intro, sound effects, and all the guests tracks together.
Some multi-track DAWs include Pro Tools, Reaper (used by many voice actors), Logic, Presonus Studio One, Cubase, and more.
However, for most voice actors, a single-track DAW can make life a lot easier.
Single-track DAWs display your recording in a big ol' waveform on your screen - allowing you to quickly dig through all the details of your VO recording and edit it insanely fast - and not be distracted by other tracks or buttons you simply don't need.
At the end of the day, most DAWs do the same thing. What's most important is getting skilled at whatever DAW feels most comfortable to you. Some voice actors like the dense features of Reaper - while some voice actors find Reaper incredibly overwhelming. On the other hand MANY voice actors, myself included, love TwistedWave (Mac only) for it's simple, fast, clean interface. But some may find TwistedWave too simple or limiting.
There is no one "right" DAW for every voice actor. You just need to try one or two and see what's best for you and your budget.
Finally, these DAWs are all used on a computer (desktop/laptop). Some of them have a mobile version (like TwistedWave for iPhone) - but doing ALL of your VO work on a mobile device can be very tedious and inefficient. For your home studio, you'll want to use an actual computer.
MY TOP TWO daw RECOMMENDATIONS
for voiceover talent
This is what I use every day for all of my auditions and many of my voice-over gigs. Why? Because it's lightweight, super fast, easy to use, stable, and gives me only what I need when editing voiceover.
When I'm mixing demos or other big audio productions? I use a multi-track DAW like Pro Tools or Studio One. But for day-to-day quick voiceover work? TwistedWave is my top pick.
You're able to run plugins and other effects using "effects stacks." You can use Apple's included free plugins (which are ok but not very intuitive) or purchase third party plug-ins.
What's great is that TwistedWave is a one-time purchase (no monthly subscriptions costs). So if you're on a Mac - be sure to download the full-featured trial to see how you like it!

Adobe Audition also has the big waveform display that TwistedWave has. It's also just as fast, clean, and efficient as TwistedWave. But Adobe Audition comes with even more powerful features that are quite useful for the busy voice talent. Which is why both TwistedWave and Adobe Audition are two of the most widely used DAWs for voice actors today.
Adobe Audition includes a ton of great sounding plugins like EQ, de-esser, compressor, healing damaged audio, and more. But be careful to not over-use these plugins without proper training. I teach how to make your audio sound great with and without plugins in my Audio Ninja Course.
Another bonus with Audition is that it's both a single-track DAW and a multi-track DAW in one. So for your VO files, work in single-track mode. Need to mix in music or sound effects? Multi-track mode allows you to do so.
The one major downside to Adobe Audition is that it requires a monthly subscription fee. You cannot buy it outright like most other DAWs. However, this software is so tailored for voiceover that many talent will happily pay the monthly fee. Remember, every piece of hardware or software is a business investment :).

OTHER SOLID DAWS FOR VOICEOVER
Reaper is used by a lot of voice artists. It's incredibly powerful and fits the workflow of many talent. Especially audiobook narrators. But also not the most intuitive. Fellow geeks love it because nearly everything is customizable and there are endless features/drop-downs/settings galore. But this can overwhelm many who aren't familiar with pro audio - nor do they have the time to learn and filter through all the additional stuff. All just to do basic VO VO recording and editing.
What's awesome about Reaper they'll let you try the software free for 60 days. And if you love it, the purchase price is incredibly affordable. Give it a shot if you like lots of options or need a multi-track DAW. Once you learn and comprehend it, you'll be able to edit just as fast as other DAWs.

Presonus Studio One (MAC or PC)
Studio One is, hands-down, my favorite multi-track DAW. When I don't have to use Pro Tools, I use Studio One for my audio production work. This includes when I mix and produce voice over demos, music, or need to record my voice over some music (singing auditions).
Studio One is super fast, intuitive, and includes a simple drag and drop workflow. I love it.
But as much as I love it - unless you're doing audiobooks/podcasts/something that requires multiple tracks - I still recommend a simpler, single-track DAW like TwisedWave or Adobe Audition.
There is a 100% free version of Studio One, called Studio One Prime, that is be more than adequate for voice actors needing a multi-track DAW. If you ever want some more features, like using third-party plugins, I'd recommend upgrading to Studio One Artist.

BALLIN' ON A ZERO DOLLAR Budget
For a free DAW - Audacity is quite powerful. It's fairly easy to use and get started. But it also has a lot of stuff that may get in your way for quick VO editing.
I don't find it's workflow that helpful for smooth, efficient voiceover editing. But it gets the job done and is a great to learn the basics of audio recording and editing. It's just a lot easier and faster to edit in something like TwistedWave or Adobe Audition.
It includes a wide array of effects - which vary in how easy and effective they are. However, Audacity has one of the best free noise removal tools on the market. But I find many voice talent applying too much noise noise removal on their audio. Which only makes their audio sound even worse. I cover how to prevent noise and, if you must, use noise removal safely and effectively in my Audio Ninja Masterclass.
Give Audacity a try if you are just getting started and have no money to spend on a DAW yet. But if you want to build an efficient business, I would strongly encourage you eventually upgrade to another DAW like TwistedWave, Adobe Audition, or Reaper.

GarageBand is a free, multi-track DAW that comes with all Mac computers.
GarageBand is purely designed for musicians and songwriters. So, for voice acting work, it can be a bit cumbersome. Like Audacity, it's a great DAW to get started on and learn the basics of audio recording and editing. But you will eventually hit a wall in terms of how quickly you can work and edit your VO audio.
GarageBand also includes some great, free plugins. But if you rely on presets like "female vocal" - it will most likely make your VO file sound very processed. Clients want our VO audio to sound clean and transparent.
Just like I said with Audacity, give GarageBand a try if you can't afford a DAW yet. But you'll eventually want to upgrade to something like TwistedWave or Adobe Audition if you want to work more efficiently and get more done. Remember: time is money.

MICROPHONE STANDs
So you kinda need something to hold that fancy microphone of yours, right? What mic stand you get highly depends on the amount of space you have in your...well...space 😜. How much space do you have around you for a microphone arm to bend? Will you be sitting? Standing? I recommend most voice over artists stand whenever you can. But if you do a lot of audiobooks or long, eLearning training videos - sitting is probably best.
TRIPOD STANDS

The most affordable and common mic stands are called "tripod" mic stands. They have 3 legs on the bottom that spread out and take up a lot of floor space. Also, notice how the back of the boom-pole can be pretty long? Depending on how much, or how little, you need to extend the boom arm to reach your mouth - the back of this pole can eat up a ton of space. Space which may not exist in your recording space.
Let's say you want to tuck this mic stand against a wall. You might not be able to because of how much space the back of that pole may need poke out. It's just something to consider before purchasing.
Because of how much awkward space tripod stands require - I have exclusively used desk/wall mounted mic boom arms for years (see below).
DESK/WALL MOUNTED BOOM ARMS

Desk or wall mounted boom arms are so convenient! Why? They don't take up any floor space and they don't require constantly loosening/tightening knobs to make most mic adjustments. You can lift, lower, or swing the mic out of the way when not in use.
Not all desk boom arms are built the same. With cheaper desk boom arms you may have problems like squeaking of the joints, or even hearing the springs inside the boom arm vibrate when you yell or barely touch your desk. Cheaper arms will also not be able to hold heavier microphones, like the Townsend Labs Sphere L22 mic, without sagging.
You can either clamp the boom arm to your desk/shelf, causing zero damage - or drill a hole to make it official. Some boom arms come with wall mounting kits too to clear up desk space!
Good quality boom arms do come at a higher price-point than a decent tripod stand. But I find them very worthwhile. I've been using multiple Rode PSA1 boom arms for over 6 years without replacing them.
DESK STANDS

Finally we have desk stands. These are very budget friendly, take up zero floor space, and allow you to quickly get good mic positioning...but only if you're sitting down or have a standing desk.
The downside is that these take up valuable desk space and can get pretty awkward and frustrating. They also are very susceptible to any vibrations you make typing or bumping your desk. I only use these when I'm traveling and recording in hotel rooms. They're super portable and great for brief VO sessions. But as your permanent solution? Probably not.
TRIPOD STANDS
DESK/WALL MOUNT ARMS
DESK STANDS
POP FILTERS
Unless you have absolutely perfect mic technique, which nobody does 😉, you're going to need a pop filter. When you speak the letter "P" a gust of wind comes out of your mouth. This also happens with other letters or letter combinations. And if this gust of wind his the mic hard enough, you'll hear that deep, bass WOOSH sound in your audio. Which sounds terrible and unprofessional if you're constantly "popping your Ps."
If you want to learn more about preventing plosives and how to fix them - check out my free video lesson from The Audio Ninja Masterclass.
TRADITIONAL POP FILTERS

The type of pop filter that's been around forever. They come in all shapes or sizes - but it's typically a plastic or metal/mesh circle attached to a gooseneck. You clamp the base of the pop filter to your mic stand and try to angle the pop filter in front of your microphone (watch the video above for ideal placement).
These block plosives well but can be incredibly difficult to angle correctly. For example, I can't mount them very well on my Rode PSA 1 boom arms.
There is no "perfect material" for a pop filter. Metal mesh filters have become a lot more popular the past few years compared to the more traditional nylon fabric filters.
The other downside is that these pop filters can sometimes make it difficult to see your script.
MIC-MOUNTED POP FILTERS

I absolutely love these pop filters. Why? Because they stay the hell out of my way. They don't block my screen and they stay ON the mic when I move the mic around. It's heaven.
The one downside is that they aren't quite as effective and STOPPING the plosives as a more traditional pop filter. Traditional pop filters have a bigger air gap between the back pop filter and the front of the mic. These mic-mounted pop filters have very little space behind the filter for your plosives to diffuse. This is wear optimal mic positioning and mic technique come into play.
WINDSCREENS

Did you microphone come with an ugly piece of black foam? This is called a windscreen. You slide the windscreen over the top of your microphone. It's primary intention is to, yes, block actual wind - but for us in-studio voice actors - they are meant to block mouth-wind (plosives).
These can be quite effective and blocking plosives. However, the thick foam can make the high frequencies of your voice sound a bit dull and flat. This is great if your microphone is already very bright or harsh sounding. But if your mic doesn't need the sparkly high frequencies tamed - then a windscreen can sometimes make it sound slightly duller.
traditional pop filters

MIC-MOUNTED POP FILTERS
WINDSCREENS
MAKE ALL THAT GEAR SOUND AMAZING
It's one thing to own professional gear - but it's another thing to know how to use it correctly and get your recording space sounding amazing.
There are A LOT of meh sounding home studios out there. If you want to make your studio sound just as good as a pro studio - be sure to check out my in-depth Audio Ninja Masterclass course.
I make it fun, not boring, to learn the ins and outs of your recording gear, software, and recording space. So no matter what changes happen (like a new mic) in your studio - you'll know exactly how to optimize it to sound it's absolute best.
